"Severely criticised by their political opponents for neglecting their official duties, it was said that they had no thought but to live out their days in rural retirement."
Showing posts with label kitchen. Show all posts
Tuesday, March 10, 2026
Saturday, July 27, 2019
Happiness is a cat with heart disease who wants to live
Here she is, all sick like, trying to catch some rays before judgment day.
Well, it's judgment day, and wouldn't you know it, she bestirred herself, rose up from the sick bed at 06:00, ate some dry food and trotted upstairs. Then she jumped to her happy place on the coffee table for a little rubdown, and then to the fountain for a good long drink like she hadn't drunk in two days. Well, she hadn't drunk in two days, nor eaten. And then she turns up in the kitchen at her feeding spot, looking at me like what's for breakfast, tender tuna or chicken?
She's definitely turned a corner. Judgment day, postponed.
Tuesday, July 17, 2012
Larry Norman: Sittin' in my kitch'n
Maybe the most affecting performance he ever gave. Wouldn't have been nearly the same without the choir, though, imho.
See it here.
Sunday, October 17, 2010
Lazy Peasant Bread
Usually when I make the European Peasant Bread recipe from Artisan Bread in Five Minutes a Day by Jeff Hertzberg and Zoe Francois, I make all the loaves right away, one in a greased non-stick loaf pan and two in greased Pyrex loaf pans, and freeze them after slicing. Why? Because I'm a lazy bum and those are the only pans I own, and I need bread to make lunches in a hurry most mornings.
I like their version baked on a stone with water steaming beneath in a broiler pan, but I'm also adapting the recipes to satisfy the sandwich tastes of a ten year old, not the artisanal desires of his dad. But even at that, the high moisture dough method is still hard to handle without the refrigeration step, and dividing the mass into two, let alone three, is not easy.
So I got to thinking. Why not use a different type of pan, a big one, and bake a giant loaf? Since the lady of the house makes the pizza every Saturday in four cast-iron skillets of varying size, I asked myself why not bake the bread in my greased 4 quart cast iron dutch oven by Lodge?
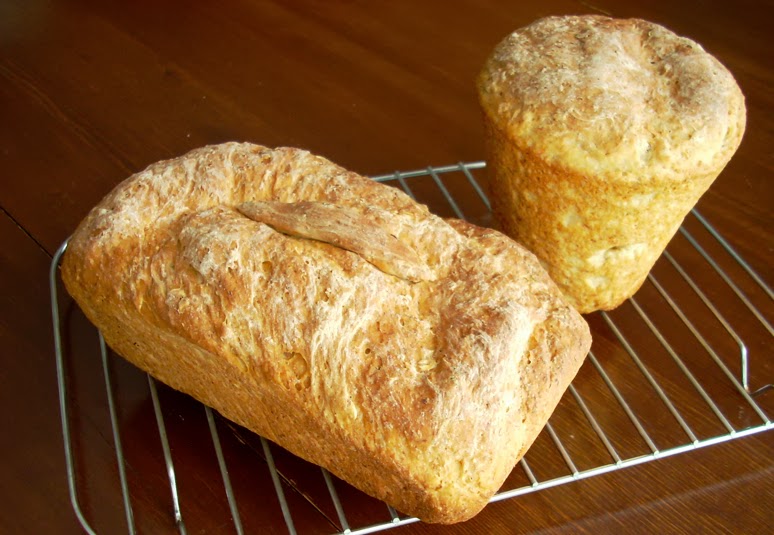
Another stroke of genius, I dare say. The bread popped out of the thing after the requisite 35 minutes at 450 degrees F looking like a cake! And the really cool thing is you have wonderful crust, but less of it, just perfect for sandwiches for a youngster.
The recipe requires 1.5 T yeast and 1.5 T salt, dissolved in 3 cups lukewarm water in the bowl of the KitchenAid Mixer, to which you add .5 cup whole wheat flour, .5 cup dark rye flour, and 5.5 cups unbleached all purpose flour, using the scoop and scrape method to measure. Once it's all in, I let the mixer work at it for five minutes on setting two, after which you can plop the whole thing into a well-greased camp oven or dutch oven and let rise for an hour or so, covered with a thin flour sack dish towel, and bake.
The result is pictured below. Enjoy!
Labels:
bread,
Camp Oven,
cast iron cooking,
Dutch Oven,
kitchen,
Lodge Manufacturing,
wheat
Tuesday, September 1, 2009
Flaxen Oat Bread
![]() |
| Two of three I baked today, one in a clay baker. |
Shortly after she died in September 2008, a book arrived in the mail, Artisan Bread in Five Minutes a Day by Jeff Hertzberg and Zoe Francois (St. Martin's Press, 2007). I've been baking bread ever since. The following recipe is my adaptation of their recipe for oatmeal bread. Unlike them, I let the dough rise only the one time and in the greased pans I bake them in. I also bake all the loaves at once, and freeze them after they have been cooled and sliced. You can modify some of the ingredients from their original recipe as I have below, by using 2% milk, buckwheat honey, and flax, among other things, in favor of the super foods. Her highness loves it.
Flaxen Oat Bread
1.75 cups lukewarm water
1 cup 2% milk
2 T canola oil
2 T canola oil
.5 cup sugar, light or dark brown sugar, or buckwheat or clover honey, or maple syrup
2 T yeast
1 T salt
6 T ground flaxseed meal
1 cup oat bran
1.5 cups whole rolled oats
5 cups unbleached all purpose flour
1. Combine the water, milk and oil in the bowl of your KitchenAid Mixer.
2. Add the sugar, yeast and salt to the bowl and mix using the triangular head. Add the flaxseed meal, oat bran and whole oats and mix for a couple of minutes to allow the oats to soak up the moisture.
3. Scoop into the flour with your measuring cup, tapping with a butter knife and scraping cleanly across the top, and add one cup at a time allowing the mixer to incorporate the flour for at least a minute for each cup. I find that as you approach the fifth cup it takes longer to incorporate, and I move the bowl up and down as needed to keep the added flour from poofing out the top.
4. Scrape the dough off the hook into the bowl with a silicone spatula, and scrape the sides of the bowl, too.
5. Grease your baking pans (I use glass bread bakers) and then grease both hands with the Crisco. Grab a grapefruit size wad of dough and manipulate it with your hands and shape it to fit your pan, and drop it in.
6. When all the pans are full, I put mine in the microwave above the stove to rise, where the preheating oven to 350 degrees F below helps the bread rise. It takes about 45 minutes to rise.
7. Then bake in the oven at 350 F for about 40-45 minutes and when done turn out onto a wire rack to cool. I like a longish bake as opposed to a shorter one.
This bread is moist, and likes to be thoroughly cooked and thoroughly cooled before slicing.
Wednesday, August 19, 2009
Hot Italian Sausage, Super Foods Style
Wednesdays and Saturdays at our house are Italian days, not because we're Italian, but because we like their food! My mother's maiden name is spelled just like a town in Tuscany, which was news to her. But her dad also looked more like a wiry Sicilian than a farmer from Germany. Hard to figure it out, after all these years. But this recipe for hot Italian sausage isn't hard, and you're going to love it, because it's delicious, good for you, and passes the kid test with flying colors!
You can make this sausage and serve it alongside the pasta with a fresh steamed vegetable with a little butter. (Broccoli florets are always popular here). Or you can break it up in my basic tomato sauce, semi home made, and serve it on the pasta. And it's also nice crumbled on the pizza! or in an omelet! How about in the lasagna?! Stuff it in the ravioli! Oh! Italian sausage! How do I love thee? Let me . . . get on with it.
Hot Italian Sausage Dry Seasoning Mix
.25 t garlic powder
.25 t dried thyme
.25 t freshly ground pepper
.5 t whole fennel seeds
1 t crushed red pepper flakes (pretty hot in this quantity, so be ready)
1 t salt
1.5 t paprika
Clean out the electric coffee grinder, but don't go crazy. Leave some traces of the espresso behind. It's good. Add all the ingredients above and let her rip for a minute or so. You have now made the seasoning for 1.25 lbs. of meat (and now you should clean the grinder thoroughly, unless you like your next cup a little spicy).
Hot Italian Sausage, Super Foods Style
1 prepared Hot Italian Sausage Dry Seasoning Mix recipe
1.25 lbs. ground turkey (half a 2.5 lb. flat of Jennie-O lean ground turkey)
Drop the turkey meat into a large bowl. Sprinkle the dry seasoning evenly over the turkey until you have covered it uniformly, then work it in with ye old trusty potato masher. Repeat until all the seasoning is mixed into the meat.
Next, oil or grease a 3/4 inch deep, 3 1/2 inch diameter form to receive the meat mixture to make sausage patties. (I use the rubber end of an old Zyliss Food Chopper. You can improvise with some other old lid to something, or buy one of those metal hamburger forms. It really doesn't matter if the size varies a little. If you're adventurous and have a KitchenAid mixer with a sausage making attachment, go for it! But you'll need casing!). Using a fork, load the form with meat and make a patty that holds together without being too densely packed. Plop it out onto a large plate and go on to the next one. I can make almost six with my form.
Heat a large dutch oven over medium heat for a couple minutes, then add canola oil to cover the bottom with a shallow pool. The high sides of the oven will help prevent splatters. Fry the patties two or three at a time over medium low heat, about four minutes per side. Drain and reserve the fried patties in a warm oven as you go. That's it. Badabing, badaboom.
Subscribe to:
Posts (Atom)